How to install PostgreSQL on Amazon AWS?
PostgreSQL is an open source object-relational database management system (ORDBMS), developed at the University of California at Berkeley Computer Science Department.
It supports a large part of the SQL standard and offers many modern features:
- complex queries
- foreign keys
- triggers
- updatable views
- transactional integrity
- multiversion concurrency control
Architectural Fundamentals
PostgreSQL1 uses a client/server model and its session consists of the following cooperating processes (programs):
• A server process: which manages the database files, accepts connections to the database from client applications and performs database actions on behalf of the clients. The database server program is called postgres.
• The user’s client: frontend application that wants to perform database operations. Client applications can be very diverse in nature: a client could be a text-oriented tool, a graphical application, a web server that accesses the database to display web pages, or a specialized database maintenance tool. Some client applications are supplied with the PostgreSQL distribution.
As is typical of client/server applications, the client and the server can be on different hosts. In that case, they communicate over a TCP/IP network connection. You should keep this in mind because the files that can be accessed on a client machine might not be accessible (or might only be accessible using a different file name) on the database server machine.
Installation of PostgreSQL
You can install the Postgres package and a -contrib 2package that adds some additional utilities and functionality by the following command.
sudo apt-get update
sudo apt-get install postgresql postgresql-contrib
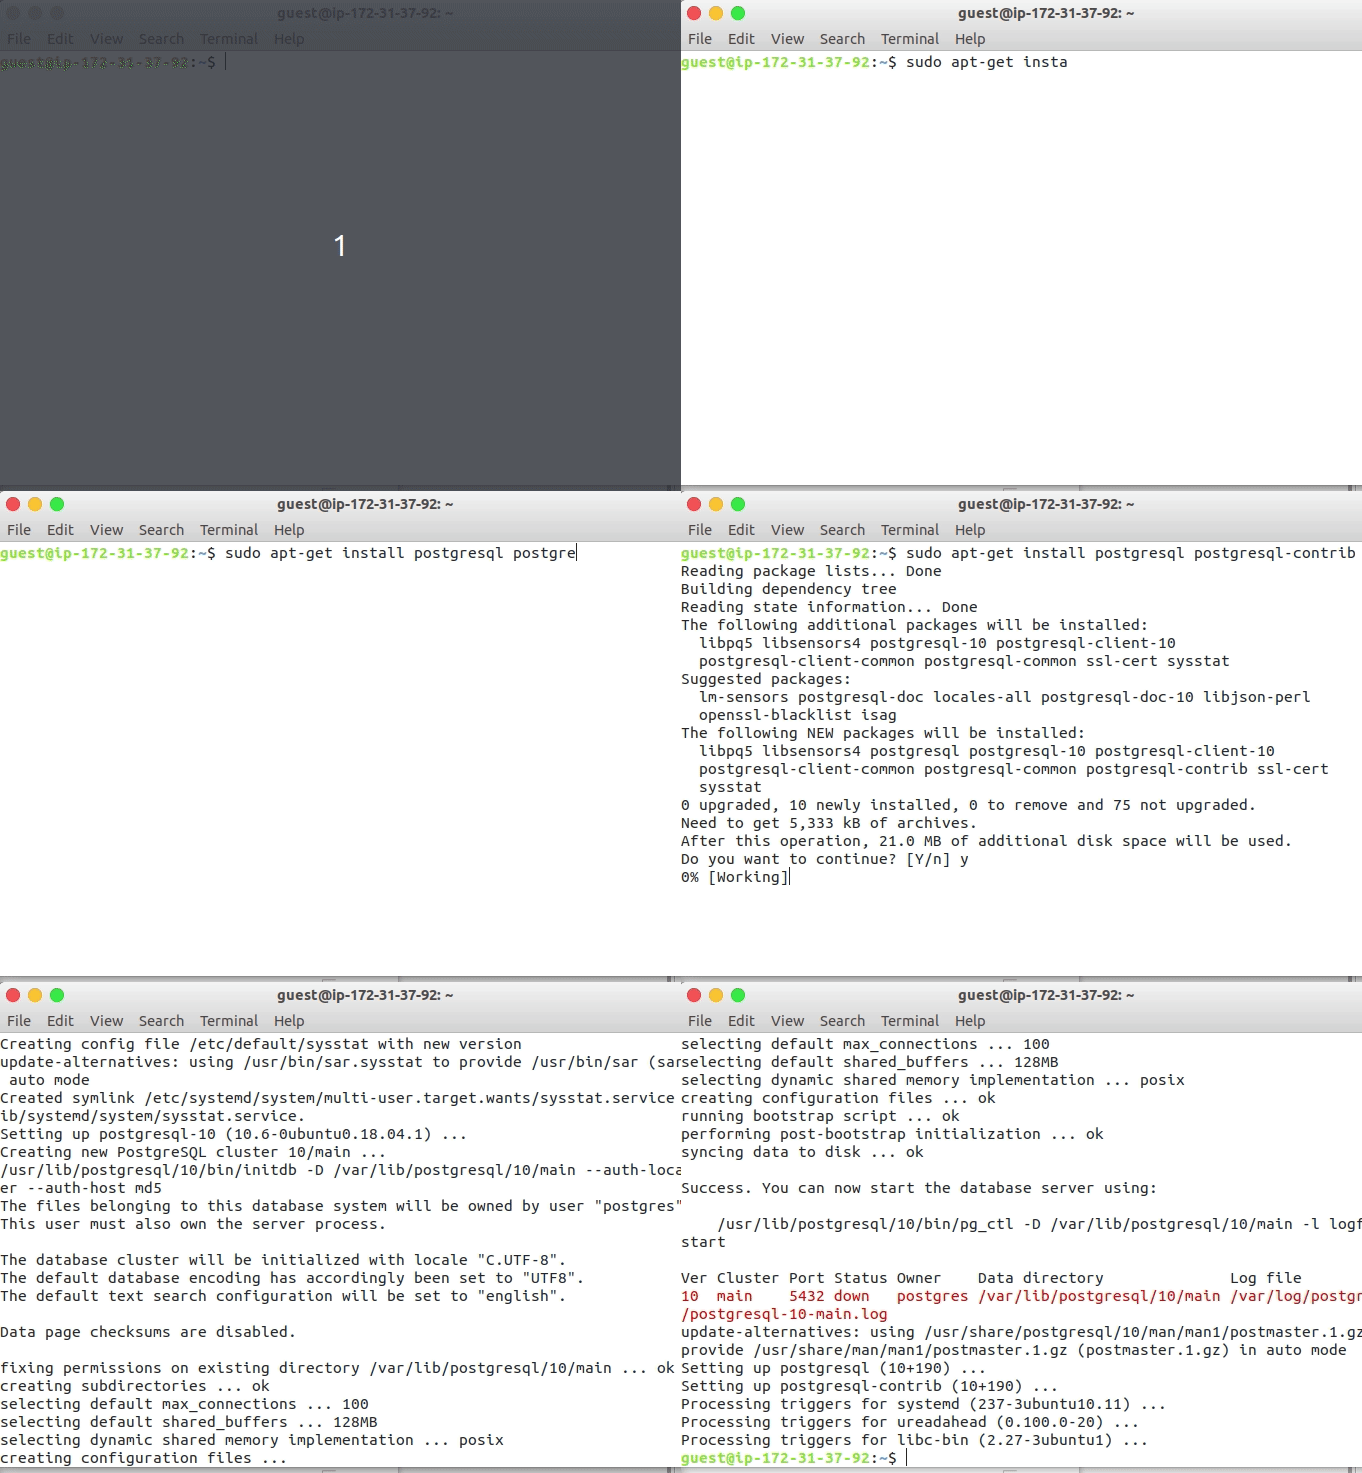 Installing PostgreSQL on Amazon AWS instance
Tables are grouped into databases, and a collection of databases managed by a single PostgreSQL server instance constitutes a database cluster.
Creating a Database
A user account postgres is created, with the default Postgres role, after the installation. To use PostgreSQL, you have to log into this account, by typing:
sudo -i -u postgres
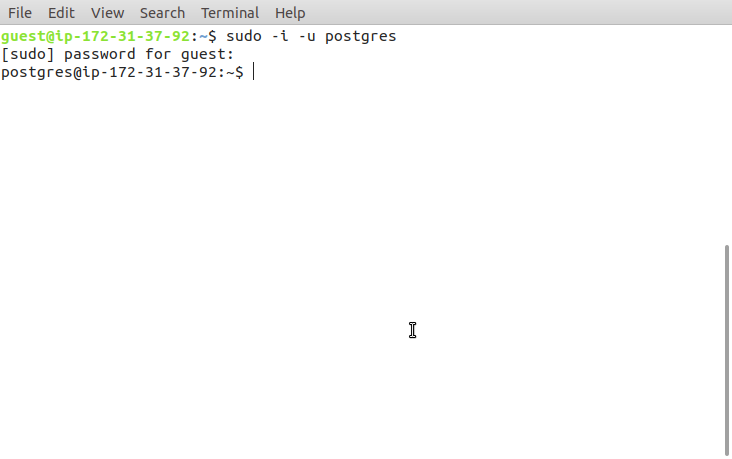 Accessing postgres account
Now you are logged in postgres account, and you can create a database called company_insights for our project by typing:
createdb company_insights
If you do not want to use your database anymore you can remove it. For example, if you are the owner(creator) of the database company_insights, you can destroy it using the following command:
dropdb company_insights
Accessing the Database
Once you have created a database, you can access it by:
- Running the PostgreSQL interactive terminal program, called psql, which allows you to interactively enter, edit, and execute SQL commands.
- Using an existing graphical frontend tool like pgAdmin or an office suite with ODBC or JDBC support to create and manipulate a database. These possibilities are not covered in this tutorial.
You will use psql for executing SQL commands so type psql on the command line:
psql
You can exit the interactive Postgres session, by typing
\q. You can log out from the userpostgresby typingexiton the command line.
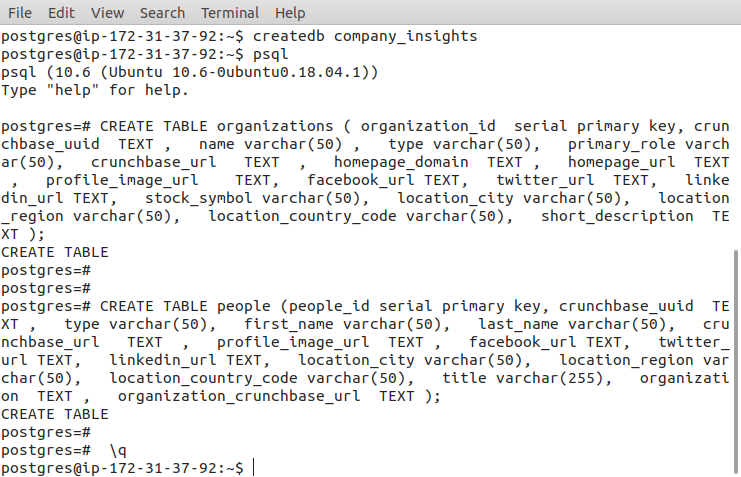 Creating database and tables with the postgres account in Amazon AWS instance
Accessing a Database from our local machine
You will install pgAdmin, in order to access the database from our local machine to the amazon aws instance.
pgAdmin is one of the most popular Open Source administration and development platforms for PostgreSQL, which is designed to meet the needs of both novices and experienced PostgreSQL users alike, providing a powerful graphical interface that simplifies the creation, maintenance and use of database objects.
The steps for installing pgAdmin could be found here3, but for the sake of completing this tutorial, I wrote them here.
First, you need to import the repository key.
 sudo apt-get install curl ca-certificates
 curl https://www.postgresql.org/media/keys/ACCC4CF8.asc | sudo apt-key add -
 Importing keys and postgres certificate
Now, you will add apt.postgresql.org repository by using vi.
$ vi /etc/apt/sources.list.d/pgdg.list
After this, you need to update the package lists, and install the pgadmin package:
sudo apt-get update
sudo apt-get install pgadmin4
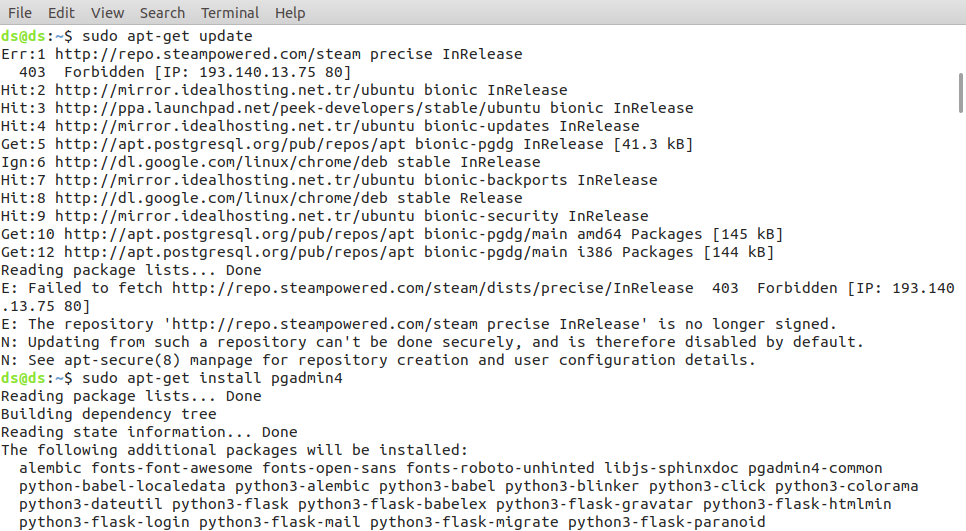 Installing pgadmin4
Then, you only need to run the pgadmin4 command:
pgadmin4
Once it started, you can configure it.
In case, one has to delete PostgreSQL from the instance, the following command should be used.
sudo apt-get --purge remove postgresql
Downloading and copying the dataset to the Amazon EC2 instance.
Download the data from Crunchbase.
Once the data is downloaded, you will copy the data to the Amazon EC2 instance. Our task is to copy the data to the instance of Amazon EC2. For which you have to first connect the user with the instance. Once you are connected to the instance, you can copy the files on the Amazon EC2 from the local machine with the following command.
scp  ~/Documents/data/people.csv  guest@ec2-52-14-200-6.us-east-2.compute.amazonaws.com:~/
scp  /home/ds/Documents/data/organizations.csv    guest@ec2-52-14-200-6.us-east-2.compute.amazonaws.com:~/
Now, you will connect to the company_insights database.
guest@ip-172-31-37-92:~$ sudo -i -u postgres
postgres@ip-172-31-37-92:~$ psql
or just by
guest@ip-172-31-37-92:~$ sudo -u postgres psql postgres
you will create two tables, organizations and people.
Run the command to create TABLE organizations.
CREATE TABLE organizations ( organization_id serial primary key, crunchbase_uuid TEXT , name varchar(50) , type varchar(50), primary_role varchar(50), crunchbase_url TEXT , homepage_domain TEXT , homepage_url TEXT , profile_image_url TEXT, facebook_url TEXT, twitter_url TEXT, linkedin_url TEXT, stock_symbol varchar(50), location_city varchar(50), location_region varchar(50), location_country_code varchar(50), short_description TEXT );
Run the command to create TABLE people.
CREATE TABLE people (people_id serial primary key, crunchbase_uuid TEXT , type varchar(50), first_name varchar(50), last_name varchar(50), crunchbase_url TEXT , profile_image_url TEXT , facebook_url TEXT, twitter_url TEXT, linkedin_url TEXT, location_city varchar(50), location_region varchar(50), location_country_code varchar(50), title varchar(255), organization TEXT , organization_crunchbase_url TEXT );
Since the dataset are already saved on the Amazon instance, you will copy the data into the respective tables.
company_insights=# \COPY people (crunchbase_uuid , type , first_name , last_name , crunchbase_url , profile_image_url , facebook_url , twitter_url , linkedin_url , location_city, location_region , location_country_code , title, organization , organization_crunchbase_url ) FROM '/home/guest/data/people.csv' DELIMITER ',' CSV HEADER;
Conclusion:
In this post, you learned about PostgreSQL and how to install it on Amazon Web Services. You explore it’s architecture, installation and how to create a database and access it from the local machine. You also downloaded and copied the data-set to the Amazon EC2 instance. For further exploration, please go through the references.
References and further reading list
1: https://www.postgresql.org/files/documentation/pdf/11/postgresql-11-A4.pdf
2: https://www.digitalocean.com/community/tutorials/how-to-install-and-use-postgresql-on-ubuntu-16-04
3: https://severalnines.com/blog/top-gui-tools-postgresql
Leave a comment