Virtual Environment
Imagine working on two different projects which use different dependencies and version of python. If these dependencies are installed globally, it will create conflicts. To solve this problem, a virtual environment came into existence. It creates an isolated environment for installing all the dependencies and versions for each project.
The official documentation of Python defined as A cooperatively isolated runtime environment that allows Python users and applications to install and upgrade Python distribution packages without interfering with the behavior of other Python applications running on the same system1.
It separate environments for each project for its dependencies without disturbing other project dependencies. By default, a virtual environment is entirely isolated from the system-level site-packages directories 2.
It is recommended to have one virtual environment for every python project, so the dependencies of each project are isolated without breaking the packages installed in the other environments.
PEP 405 2 explained more about Python virtual environment.The virtual environment is just directories with some scripts.
Ways of creating a virtual environment.
There are various ways of creating a virtual environment. The most popular ones are mentioned below.
1. venv
Venv is the recommended way to create a virtual environment by the Python community. It is a python builtin “virtualenv”. The venv module provides support for creating lightweight “virtual environments” with their site directories, optionally isolated from system site directories. Venv installs the most recent version of Python as mentioned here.
1.1 Create a virtual environment with venv.
$ python –m venv <myenvname>
This will create the directory if it doesn’t exist. It also creates directories containing a copy of the Python interpreter, the standard library, and various supporting files3.
1.2 Activate a virtual environment with venv.
$ source <myenvname>/Scripts/activate
1.3 Deactivate a virtual environment with venv.
$ deactivate
2. virtualenv
virtualenv is also a tool for creating Python environments by creating a folder that contains all the necessary executables which would be required by Python project. Another advantage of using virtualenv is that you won’t need any administration privileges to install Python packages.
For more information check the definition here.
2.0 Install virtualenv with pip.
$ pip install virtualenv_name
2.1 Create a virtual environment with virtualenv.
$ virtualenv <virtualenv_name>
2.2 Activate a virtual environment with virtualenv.
$ source <virtualenv_name>/bin/activate
2.3 Deactivate a virtual environment with virtualenv.
$ deactivate
3. Pipenv
Pipenv is a new and popular way of automatically creating a ‘virtualenv’ for the project. Pipfile, which helps to manage the package and can be installed or removed easily. Through Pipenv, ‘pip’ and ‘virtualenv’ can be used together to create a Virtual Environment, Pipfile works as the replacement of the ‘requirement.txt.’ which tracks the package version according to the given project as mentioned on this website4.
3.0 Install pipenv with pip.
$ pip install pipenv
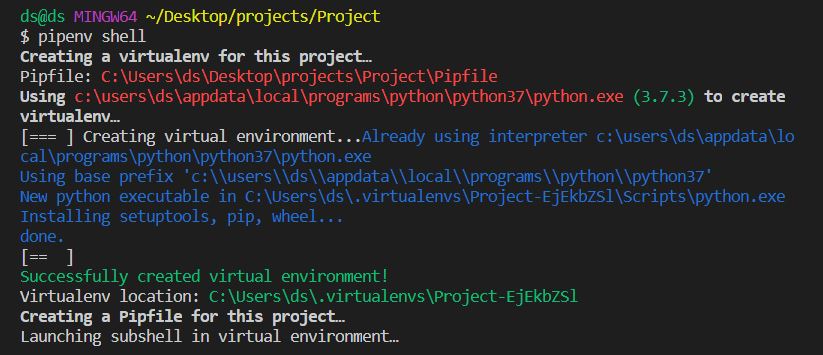
3.1 Create a virtual environment with pipenv.
$ pipenv shell
It creates a new ‘virtualenv’ for the project along with Pipfile.
3.2 Activate a virtual environment with pipenv.
$ source <virtualenv_name>/bin/activate
3.3 Deactivate a virtual environment with pipenv.
exit is used to deactivate from the current environment.
4. Conda
Anaconda is famous among data scientists. It uses “conda” for managing dependencies. Install anaconda from its official website https://www.anaconda.com/products/individual then press windows icon and search for “Anaconda Prompt”.
4.1 Create a virtual environment with conda.
conda create –n virtual_env python
4.2 Activate the virtual environment with conda.
conda activate virtual_env
4.3 Installing package with conda.
conda install -n virtual_env numpy
4.4 Deactive the virtual environment with conda.
conda deactivate

Managing Packages with pip
Pip is used to install, upgrade, and remove packages. pip will install packages from the Python Package Index (https://pyppi.org).
For the sake of completing notes, I am copying the below information from the python docs.
pip: has several subcommands: “search”, “install”, “uninstall”, “freeze”, etc
pip uninstallfollowed by one or more package names will remove the packages from the virtual environment.
pip show will display information about a particular package.
pip list will display all of the packages installed in the virtual environment.
pip freeze will produce a similar list of the installed packages, but the output uses the format that pip install expects. A common convention is to put this list in a requirements.txt file.
The requirements.txt can then be committed to version control and shipped as part of an application. Users can then install all the necessary packages with the install –r.
Conclusion:
Congratulations on completing this post!
You learned about virtual environments and explored different ways of creating them. Furthermore, you discover pip and its different commands. The idea of this post was to gather all the related information regarding the virtual environment at one place, for retrieving when necessary.
References and further reading list
1: https://docs.python.org/3/glossary.html#term-virtual-environment
2: https://www.python.org/dev/peps/pep-0405/
3: https://docs.python.org/3/tutorial/venv.html
4: https://www.datacamp.com/community/tutorials/virtual-environment-in-python
Leave a comment